The Decision Tree Of Choosing a Robot Pin Tool
Step One – Pick Mounting Plate for your Robot
This choice will allow the Pin Tool to be manipulated by the robot’s pipettor or plate handler. Which of these robot functions has the greatest range of withdrawal speeds?
If you haven’t purchased a robot yet, talked to us about which one would be best suited for your application.
Step Two – Pick Source Plate Transfer Volume
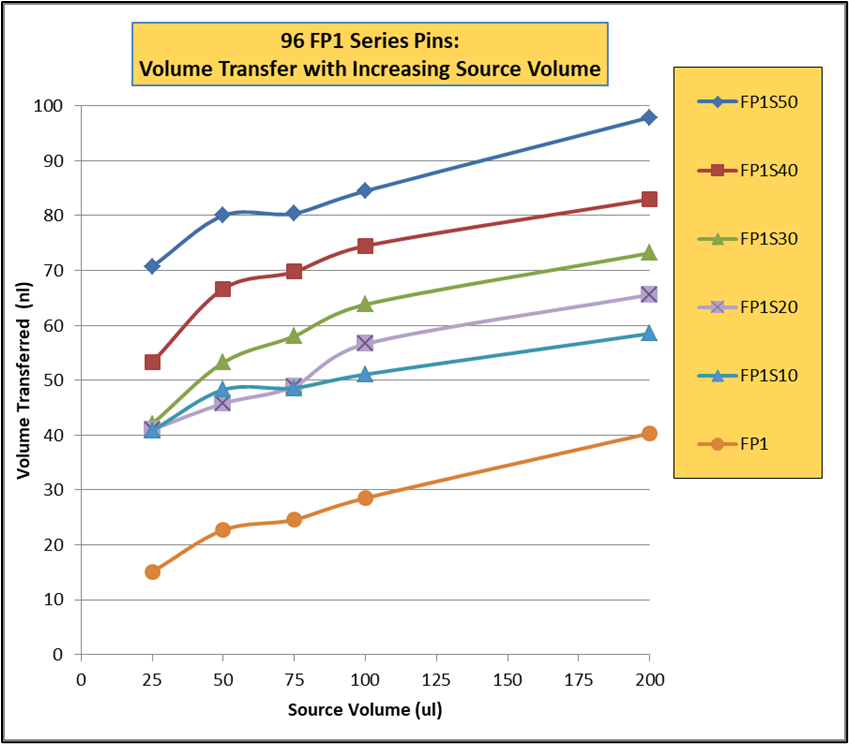
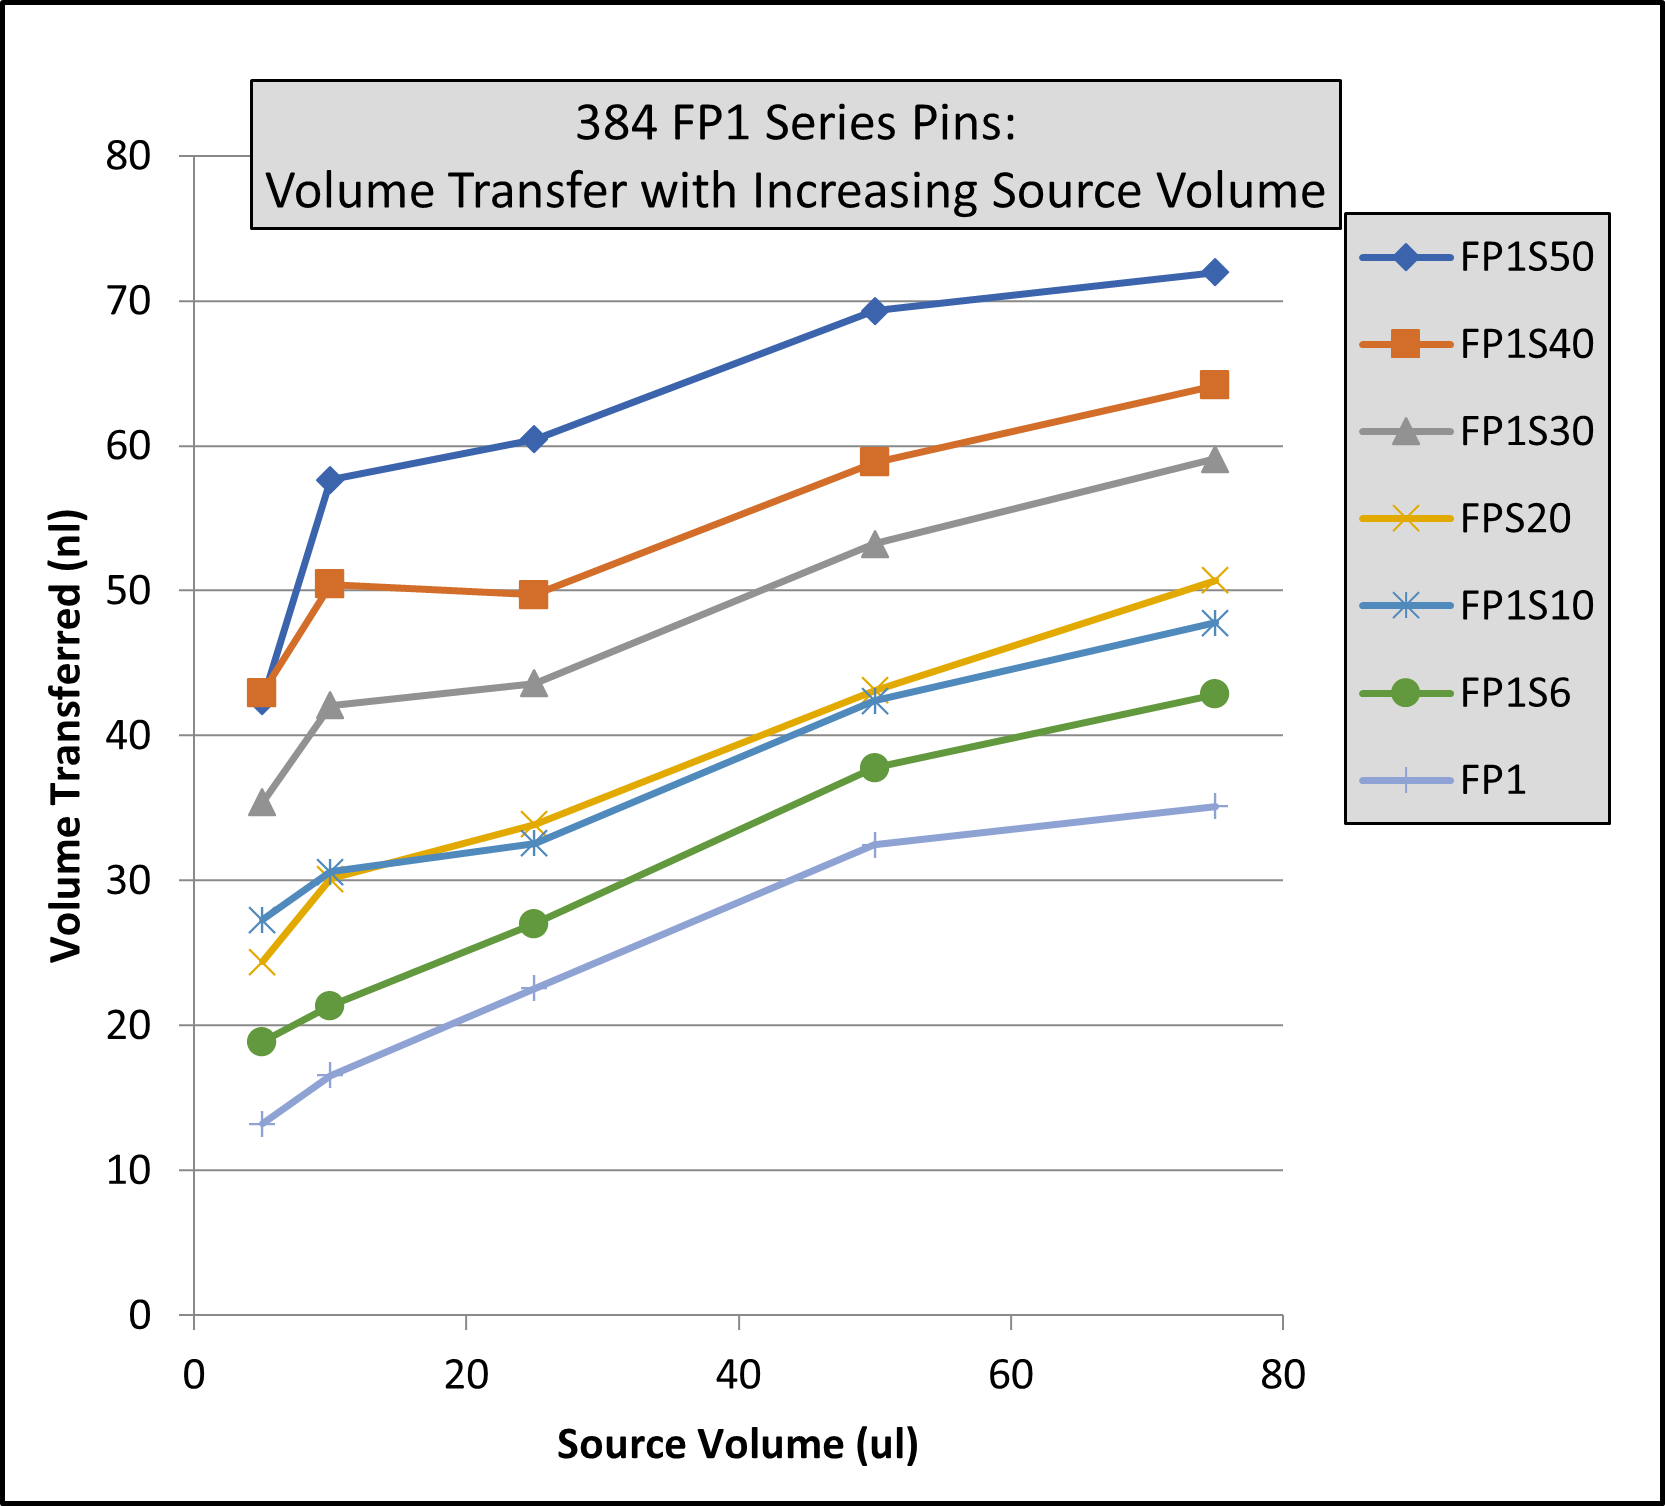
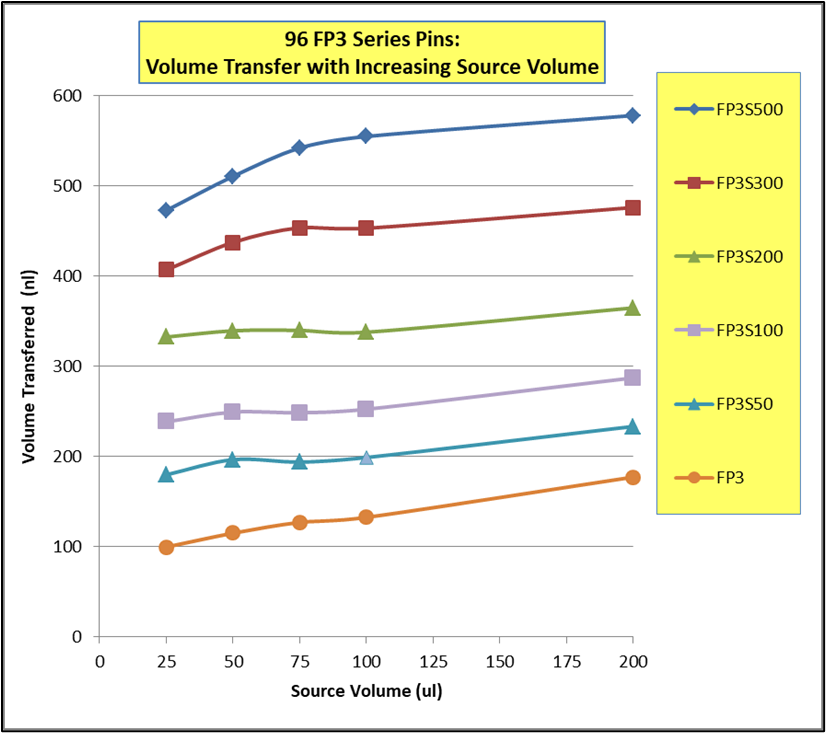
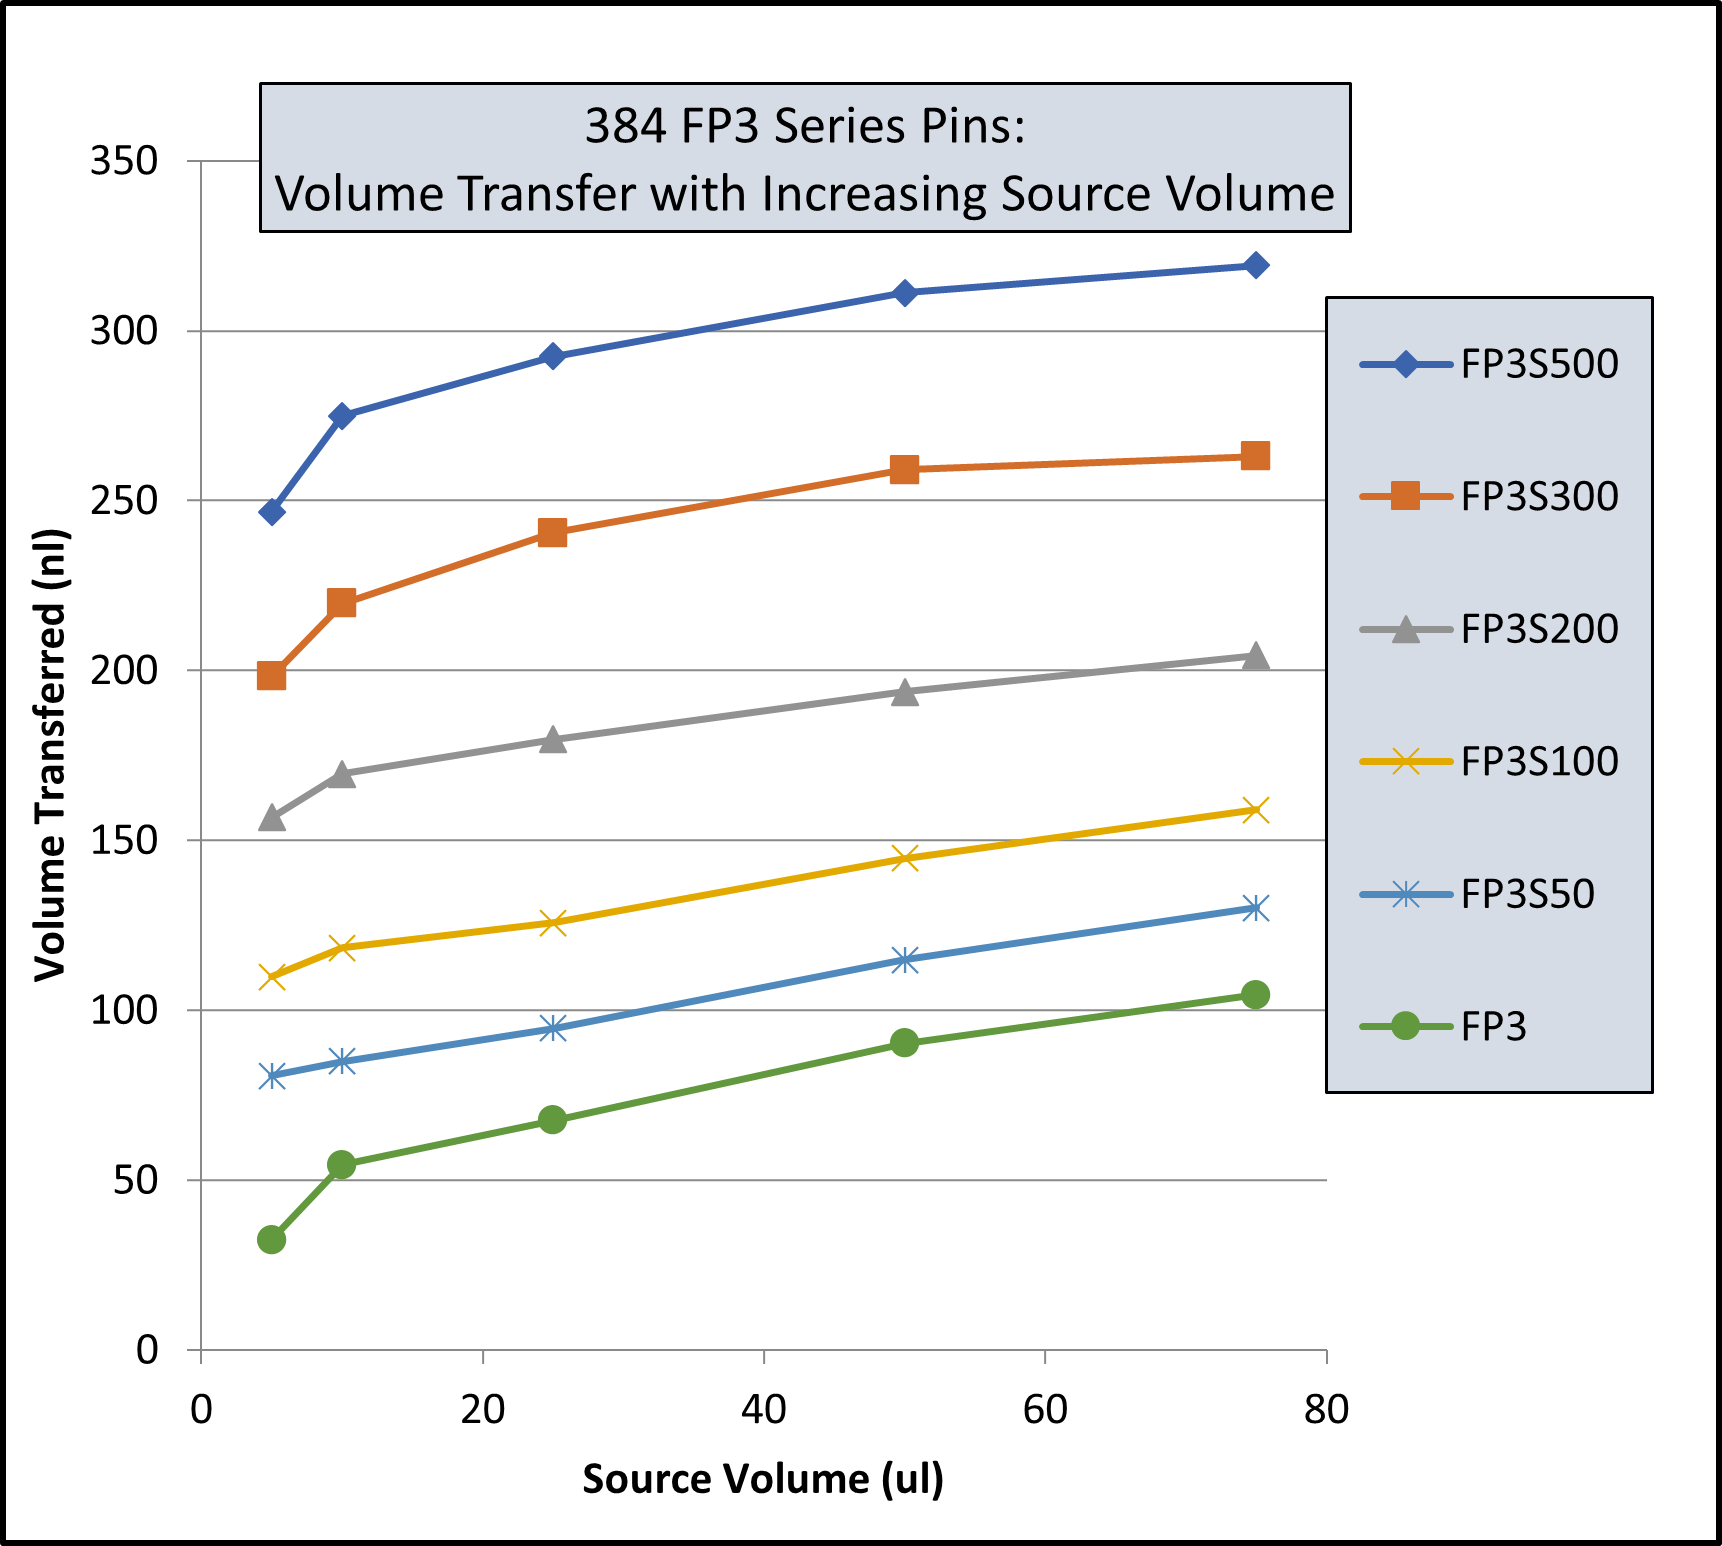
If the volume in the source wells are low or variable select a slot pin because they fill by capillary action and are less affected by the volume in the source well. If the source well volume is high or constant select a solid pin as they are more economical. If the pin will transfer a liquid to an agar surface, select a solid pin as they are easier to clean off carry-over agar.
More liquid is transferred with a Slot Pin than with a Solid Pin and the larger the slot the more is transferred.
See Chart.
Maintaining consistent volume in plates using Solid Pins is more important than when using Slot Pins.
See Chart.
Step Three – Pick a Desired Pin Transfer Volume
Pick a Pin based on the combined conditions of the volume in the source microplate, the nature of the liquid (Aqueous, DMSO) and its surface tension (BSA, DNA or Tween 20) the diameter and shape of the wells, and the speed range of withdrawal of your robot.
See Charts for the Range of Transfer in
DMSO and
Aqueous Solutions. The faster the withdrawal speed the more liquid is transferred. This phenomenon allows you to significantly adjust the volume transferred with your robot’s speed.
See Chart.
Select hydrophobic pin coating if the analyte will non-specific bind to stainless steel
Hydrophobic Coated pins transfer slightly less than uncoated pins.
See Chart.
We also offer sterile and non- sterile 96 and 384 pin disposable polypropylene pin tools that can be manipulated robotically, these each deliver ~ 100 nl.
Step Four -Pick Microplate Height
If a deep well microplate is selected then a “T” tall pin is required to reach the bottom of the wells. Some robots have limited Z heights and can not accommodate “T” pins with their longer exposed length (30 mm) and longer overall length (50.8mm). Those robots must use the shorter “C” pins and then are restricted to only deep well microplates that are at least 2/3 full or they are restricted to only using standard Microplates. See these drawings (Link) for the total overall height of several pin tools which includes the height of the floating fixture and the height of the mounting plate. These drawings are helpful when selecting a robot.
Step Five -Pick a Microplate Format (24, 48, 96, 384, 1536), Floating Fixture, and Registration Accessory
Registration Accessories to Match Format
Step Six – Pick the Docking Station
Match Docking Station to robotic liquid handler
Step Seven – Pick Wash Reservoir
Depending on the source liquid and the recipient liquids you need to select the appropriate wash systems. Most customers select our running H2O or ETOH Spillway wash reservoirs.
We recommend
Step Eight – Pick Cleaning Supplies
Blotting the pins on lint-free blotting paper after transferring them to the recipient microplate is very important in reducing carry-over liquids into the wash reservoirs. We recommend also blotting the pins after each wash reservoir. We also recommend cleaning the pins with our VP 110A pin cleaning solution at the end of each days use, so they are ready for use the next day.
We Recommend
Step Nine – Pick a Pin-Drying System
After the final ETOH wash and blot, select a pin drying system or let ETOH evaporate naturally over a minute or 2.
We recommend using a fan dryer, which only takes a few seconds.
VP 904A
Step Ten – Still Have Questions?
Please contact one of our knowledgeable scientists; they can guide you through the process.


